

How To Edit Anime Pictures In Photoshop
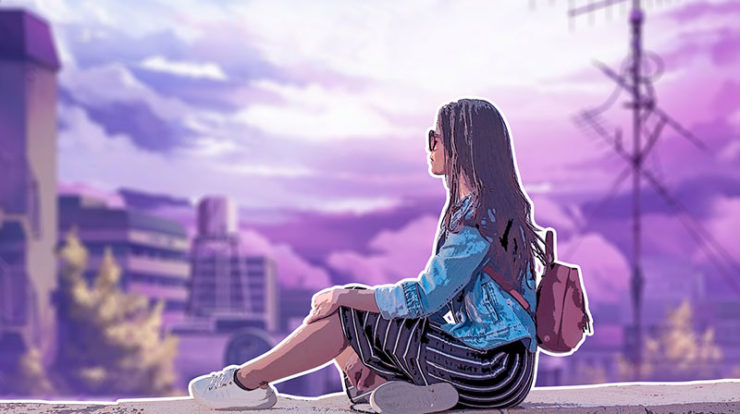
Today I will provide a tutorial on how to edit your photos with Anime-mode in photoshop. This anime-mode was first popularized by Makoto Shinkai. Well, since the release of the anime. Many people who similar the anime. Too being an interesting storyline and at that place is a thick emotional impression. Several places in the anime are in the existent world. So, there are some people who popularized photo editing with the original setting merely were converted into anime with the nuances of Kimi no Na Wa.
Okay, permit's outset the tutorial.
If you want to see this tutorial in video format, you tin can immediately watch the following video:
Get some stock photos below if you want to follow this tutorial.
- Girl Sitting
- Anime Sky Background
- Birds Png
Step one: Prepare the photo to be edited
After you download all the stock images, put them in Photoshop. Y'all can drag and driblet your image into Photoshop
Stride 2: Brand a selection
In this stage will remove the heaven from the main photo object, namely Girl sitting. For this fourth dimension selection, you tin employ the Pen Tool. You tin can freely use other tools to select objects such every bit the Lasso Tool and others.
Step three: Remove the the background in the Girl photograph
After you make a selection by using Pen tool, so Right-click and select Brand Pick then press OK. And then add Mask to the layer. it will erase the background.
Pace iv: Photo adjustment
Press Ctrl+J to duplicate the Girl photo and so go to Filter> Camera Raw. Set the Temperature to -9, Tint +13, Highlights -100, Shadows +xiii, Whites -43, Blacks +45 and Clarity +45. keep in mind that each photo has a different setting, you tin experiment with other photos.
Step 5: Add filter Affiche edges effect
Get to Filter> Filter gallery then select Artistic department then select Poster edges. Set the Edge thickness to 0, Edge intensity 0 and Posterization i then press OK. it will brand the photograph looks like cartoon effect.
Step 6: Import anime sky images
Next is the import of cloud images that yous have downloaded. You can elevate and drib it below the Girl layer. And then adjust the size of the Cloud as needed. Become to Filter> Blur> Lens mistiness to requite a blur outcome in the background
Stride 7: Change the color of Girl'south apparel
Select the Girl layer and so create a new aligning layer Hue/saturation and then click Clip to layer, go to Cyans channel then set the Hue to -3, Saturation +20 and Lightness to +4. if you lot want to change the skin color you lot can get to Reds channel.
Step 8: Add together Strokes
Select the Girl layer and then Right-click and select Blending Options. become to Stroke department, I volition fix the size to eight and don't forget to fix the colour to White. and then press OK.
Step 9: Import the Birds png
Elevate and drop the Bird png to your document. Then adjust the size as needed. Press Ctrl+I to Invert, then the birds will plough white. add together Motion mistiness to give a moving outcome.
Footstep 10: Finishing
In the concluding touches of this editing I added a new layer and so used Soft Castor to add some color effects to the image and inverse the Blending mode to Soft Lite.
That was the way to turn photos into Anime-style in Photoshop, I'm certain you can follow this tutorial and make it amend, hopefully useful.
Source: https://rafya.id/2020/07/how-to-turn-photo-into-anime-style-effect-in-photoshop.html
Posted by: jorgensenbouselt.blogspot.com
0 Response to "How To Edit Anime Pictures In Photoshop"
Post a Comment